connect target 'system/oracle'
run {
crosscheck archivelog all;
delete noprompt expired archivelog all;
crosscheck backup;
delete noprompt expired backup;
BACKUP database format '/backup/datafile/db_%t_%s_%p.dbf';
sql 'alter system archive log current';
sql 'alter system archive log current';
backup archivelog all format '/backup/archivelog/al_%t_%s_p%p.dbf' delete all input;
backup current controlfile tag =cf1 format '/backup/controlfile/cf_%t_%s_%p.dbf';
delete noprompt obsolete redundancy = 1;
crosscheck archivelog all;
crosscheck backup;
Crosscheck Copy;
Crosscheck Backup;
delete noprompt expired archivelog all;
delete noprompt expired copy;
delete noprompt expired backup;
delete NOPROMPT BACKUP OF SPFILE COMPLETED BEFORE 'SYSDATE-3';
delete NOPROMPT BACKUP OF CONTROLFILE COMPLETED BEFORE 'SYSDATE-3';
}
Oracle etiketine sahip kayıtlar gösteriliyor. Tüm kayıtları göster
Oracle etiketine sahip kayıtlar gösteriliyor. Tüm kayıtları göster
2 Mart 2017 Perşembe


22 Ocak 2017 Pazar
Oracle Delete Archivelog Using RMAN
How to delete Archivelog Using RMAN
Archivelog List Commands
RMAN>list archivelog all;
RMAN>list copy of archivelog until time ‘SYSDATE-3’;
RMAN>list copy of archivelog from time ‘SYSDATE-3’
RMAN>list copy of archivelog from time ‘SYSDATE-3’ until time ‘SYSDATE-1’;
RMAN>list copy of archivelog from sequence 786544;
RMAN>list copy of archivelog until sequence 786544;
RMAN>list copy of archivelog from sequence 50000 until sequence 60000;
Archivelog Delete Commands
RMAN>delete archivelog all;
RMAN>delete archivelog until time ‘SYSDATE-3’;
RMAN>delete archivelog from time ‘SYSDATE-3’
RMAN>delete archivelog from time ‘SYSDATE-3’ until time ‘SYSDATE-1’;
RMAN>delete archivelog from sequence 786544;
RMAN>delete archivelog until sequence 786544;
RMAN>delete archivelog from sequence 50000 until sequence 60000;
Also, you can use noprompt statement for do not yes-no question.
RMAN>delete noprompt archivelog until time ‘SYSDATE-10’;
Archivelog List Commands
RMAN>list archivelog all;
RMAN>list copy of archivelog until time ‘SYSDATE-3’;
RMAN>list copy of archivelog from time ‘SYSDATE-3’
RMAN>list copy of archivelog from time ‘SYSDATE-3’ until time ‘SYSDATE-1’;
RMAN>list copy of archivelog from sequence 786544;
RMAN>list copy of archivelog until sequence 786544;
RMAN>list copy of archivelog from sequence 50000 until sequence 60000;
Archivelog Delete Commands
RMAN>delete archivelog all;
RMAN>delete archivelog until time ‘SYSDATE-3’;
RMAN>delete archivelog from time ‘SYSDATE-3’
RMAN>delete archivelog from time ‘SYSDATE-3’ until time ‘SYSDATE-1’;
RMAN>delete archivelog from sequence 786544;
RMAN>delete archivelog until sequence 786544;
RMAN>delete archivelog from sequence 50000 until sequence 60000;
Also, you can use noprompt statement for do not yes-no question.
RMAN>delete noprompt archivelog until time ‘SYSDATE-10’;
18 Ocak 2017 Çarşamba
Oracle Change Listener Default Name
Oracle Change Listener Default Name
$ ps -ef | grep tns
oracle 9214 1 0 12:51 ? 00:00:00 /u01/app/oracle/product/11.2.0/db_1/bin/tnslsnr LISTENER -inherit
$ lsnrctl stop LISTENER
[oracle@easlan ~]$ lsnrctl stop
Connecting to (DESCRIPTION=(ADDRESS=(PROTOCOL=IPC)(KEY=EXTPROC1)))
The command completed successfully
$ $ORACLE_HOME/network/admin and modify Listener.ora
[oracle@easlan ~]$ cd /u01/app/oracle/product/11.2.0/db_1/network/admin/
SID_LIST_EASLAN=
(SID_LIST =
(SID_DESC =
(SID_NAME = PLSExtProc)
(ORACLE_HOME = /u01/app/oracle/product/11.2.0/db_1)
(PROGRAM = extproc)
)
)
EASLAN =
(DESCRIPTION_LIST =
(DESCRIPTION =
(ADDRESS = (PROTOCOL = IPC)(KEY = EXTPROC1))
(ADDRESS = (PROTOCOL = TCP)(HOST = easlan.localdomain)(PORT = 1521))
)
)
Step Four :
lsnrctl start EASLAN
Step Five :
SQL> show parameter local_listener
SQL> alter system set local_listener='(address=(protocol=tcp)(host=your-hostname)(port=1521))';
SQL> alter system register;
$ ps -ef | grep tns
oracle 9214 1 0 12:51 ? 00:00:00 /u01/app/oracle/product/11.2.0/db_1/bin/tnslsnr LISTENER -inherit
$ lsnrctl stop LISTENER
[oracle@easlan ~]$ lsnrctl stop
Connecting to (DESCRIPTION=(ADDRESS=(PROTOCOL=IPC)(KEY=EXTPROC1)))
The command completed successfully
$ $ORACLE_HOME/network/admin and modify Listener.ora
[oracle@easlan ~]$ cd /u01/app/oracle/product/11.2.0/db_1/network/admin/
SID_LIST_EASLAN=
(SID_LIST =
(SID_DESC =
(SID_NAME = PLSExtProc)
(ORACLE_HOME = /u01/app/oracle/product/11.2.0/db_1)
(PROGRAM = extproc)
)
)
EASLAN =
(DESCRIPTION_LIST =
(DESCRIPTION =
(ADDRESS = (PROTOCOL = IPC)(KEY = EXTPROC1))
(ADDRESS = (PROTOCOL = TCP)(HOST = easlan.localdomain)(PORT = 1521))
)
)
Step Four :
lsnrctl start EASLAN
Step Five :
SQL> show parameter local_listener
SQL> alter system set local_listener='(address=(protocol=tcp)(host=your-hostname)(port=1521))';
SQL> alter system register;
ORA-04031 : Unable to allocate x bytes of shared memory
ORA-04031 : Unable to allocate x bytes of shared memory
Cause :
ORA-04031 - deals with shared memory issues. It's lack of allocation of contiguous memory as and when requested by the current executing sql i.e., when process attempts to allocate a large piece of contiguous memory in the shared pool fails.
Action:
If the shared pool is out of memory, either use the DBMS_SHARED_ POOL package to pin large packages, reduce your use of shared memory, or increase the amount of available shared memory by increasing the value of the initialization parameters SHARED_POOL_RESERVED_SIZE and SHARED_ POOL_SIZE. If the large pool is out of memory, increase the initialization parameter LARGE_POOL_SIZE.
More ORA errors...
Click here to read more for best practice.
ORA-01442
ORA-00910
ORA-17629
ORA-16191
ORA-27069
ORA-00333
ORA-00600
ORA-22992
ORA-12018
ORA-07445
ORA-02020
Cause :
ORA-04031 - deals with shared memory issues. It's lack of allocation of contiguous memory as and when requested by the current executing sql i.e., when process attempts to allocate a large piece of contiguous memory in the shared pool fails.
Action:
If the shared pool is out of memory, either use the DBMS_SHARED_ POOL package to pin large packages, reduce your use of shared memory, or increase the amount of available shared memory by increasing the value of the initialization parameters SHARED_POOL_RESERVED_SIZE and SHARED_ POOL_SIZE. If the large pool is out of memory, increase the initialization parameter LARGE_POOL_SIZE.
More ORA errors...
Click here to read more for best practice.
ORA-01442
ORA-00910
ORA-17629
ORA-16191
ORA-27069
ORA-00333
ORA-00600
ORA-22992
ORA-12018
ORA-07445
ORA-02020
ORA-00054: resource busy and acquire with NOWAIT specified
ORA-00054: resource busy and acquire with NOWAIT specified
Cause : This error usually comes when you are changing DDL but object is currently using by other user. It is not a critical error.
Action : Redefine your object using ONLINE key word where ever possible.
Cause : This error usually comes when you are changing DDL but object is currently using by other user. It is not a critical error.
Action : Redefine your object using ONLINE key word where ever possible.
ORA-00918: column ambiguously defined
ORA-00918: column ambiguously defined
Cause :A column name used in a join exists in more than one table and is thus referenced ambiguously. In a join, any column name that occurs in more than one of the tables must be prefixed by its table name when referenced. The column should be referenced as TABLE.COLUMN or TABLE_ALIAS.COLUMN. For example, if tables EMP and DEPT are being joined and both contain the column DEPTNO, then all references to DEPTNO should be prefixed with the table name, as in EMP.DEPTNO or E.DEPTNO.
Action: Prefix references to column names that exist in multiple tables with either the table name or a table alias and a period (.), as in the examples above.
When ORA-00918 is thrown, you have a column which has been ambiguously defined. If a column name in a join is referenced ambiguously, it exists in multiple tables.
-- Column names which occur in multiple tables should be prefixed when it is referenced by its table name.
-- Columns must be referenced as TABLE.COLUMN or TABLE_ALIAS.COLUM . Oracle documentation which reference ORA-00918 give the following example:
-- If tables EMP and DEPT are being joined and both contain the column DEPTNO, then all references to DEPTNO should be prefixed with the table name, as in EMP.DEPTNO or E.DEPTNO.
To correct ORA-00918, references should be prefixed to column names existing in multiple tables (either with the table name or table alias and a period)
Cause :A column name used in a join exists in more than one table and is thus referenced ambiguously. In a join, any column name that occurs in more than one of the tables must be prefixed by its table name when referenced. The column should be referenced as TABLE.COLUMN or TABLE_ALIAS.COLUMN. For example, if tables EMP and DEPT are being joined and both contain the column DEPTNO, then all references to DEPTNO should be prefixed with the table name, as in EMP.DEPTNO or E.DEPTNO.
Action: Prefix references to column names that exist in multiple tables with either the table name or a table alias and a period (.), as in the examples above.
When ORA-00918 is thrown, you have a column which has been ambiguously defined. If a column name in a join is referenced ambiguously, it exists in multiple tables.
-- Column names which occur in multiple tables should be prefixed when it is referenced by its table name.
-- Columns must be referenced as TABLE.COLUMN or TABLE_ALIAS.COLUM . Oracle documentation which reference ORA-00918 give the following example:
-- If tables EMP and DEPT are being joined and both contain the column DEPTNO, then all references to DEPTNO should be prefixed with the table name, as in EMP.DEPTNO or E.DEPTNO.
To correct ORA-00918, references should be prefixed to column names existing in multiple tables (either with the table name or table alias and a period)
ORA-01031: insufficient privileges
ORA-01031: insufficient privileges
Cause: An attempt was made to change the current username or password without the appropriate privilege. This error also occurs if attempting to install a database without the necessary operating system privileges. This error may occur if the user was granted the necessary privilege at a higher label than the current login.
Action: Ask the database administrator to perform the operation or grant the required privileges. For Trusted Oracle users getting this error although granted the the appropriate privilege at a higher label, ask the database administrator to regrant the privilege at the appropriate label.
For the DBA, the ORA-01031 can happen if the target OS executables do not have read and execute permissions (e.g. (770) in UNIX/Linux), and ensure that the oracle user is a member of the dba group (e.g. /etc/group). There are similar permission in the Windows registry.
Cause: An attempt was made to change the current username or password without the appropriate privilege. This error also occurs if attempting to install a database without the necessary operating system privileges. This error may occur if the user was granted the necessary privilege at a higher label than the current login.
Action: Ask the database administrator to perform the operation or grant the required privileges. For Trusted Oracle users getting this error although granted the the appropriate privilege at a higher label, ask the database administrator to regrant the privilege at the appropriate label.
For the DBA, the ORA-01031 can happen if the target OS executables do not have read and execute permissions (e.g. (770) in UNIX/Linux), and ensure that the oracle user is a member of the dba group (e.g. /etc/group). There are similar permission in the Windows registry.
ORA-00257: archiver error. Connect internal only, until freed.
ORA-00257: archiver error. Connect internal only, until freed.
Cause: The archiver process received an error while trying to archive a redo log. If the problem is not resolved soon, the database will stop executing transactions. The most likely cause of this message is the destination device is out of space to store the redo log file.
Action: Check archiver trace file for a detailed description of the problem. Also verify that the device specified in the initialization parameter ARCHIVE_LOG_DEST is set up properly for archiving.
Cause: The archiver process received an error while trying to archive a redo log. If the problem is not resolved soon, the database will stop executing transactions. The most likely cause of this message is the destination device is out of space to store the redo log file.
Action: Check archiver trace file for a detailed description of the problem. Also verify that the device specified in the initialization parameter ARCHIVE_LOG_DEST is set up properly for archiving.
ORA-01652: unable to extend temp segment by string in tablespace string
ORA-01652: unable to extend temp segment by string in tablespace string
Cause: Failed to allocate an extent of the required number of blocks for a temporary segment in the tablespace indicated.
Action: Use ALTER TABLESPACE ADD TEMPFILE statement to add one or more files to the tablespace indicated.
Cause: Failed to allocate an extent of the required number of blocks for a temporary segment in the tablespace indicated.
Action: Use ALTER TABLESPACE ADD TEMPFILE statement to add one or more files to the tablespace indicated.
ORA-07445 - exception encountered: core dump
ORA-07445 - exception encountered: core dump
Cause : An operating system exception occurred which should result in the creation of a core file. This is an internal error.
Action : Contact Oracle Customer Support.
Common precipitators of the ORA-07445 include:
-- High volume user transactions
-- Software bugs (i.e. Bug 4098853). See note 342443.1 on MOSC.
-- Too-small RAM regions (shared_pool_size, java pool, large_pool_size), and a too-small application memory stack (e.g. PL/SQL array too small)
-- Too small undo and temp segments
-- Program errors (addressing outside of RAM region), e.g. S0C4. Improper NLS parameter settings
-- Hardware errors
-- Oracle block corruption and a host of other related issues.
-- When Oracle internal job failed with specific exception
Note: There are lots of reason for ORA-07445, Based of arguments and oracle document you can fix it. So may bugs are described in oracle document for ORA-07445.
Cause : An operating system exception occurred which should result in the creation of a core file. This is an internal error.
Action : Contact Oracle Customer Support.
Common precipitators of the ORA-07445 include:
-- High volume user transactions
-- Software bugs (i.e. Bug 4098853). See note 342443.1 on MOSC.
-- Too-small RAM regions (shared_pool_size, java pool, large_pool_size), and a too-small application memory stack (e.g. PL/SQL array too small)
-- Too small undo and temp segments
-- Program errors (addressing outside of RAM region), e.g. S0C4. Improper NLS parameter settings
-- Hardware errors
-- Oracle block corruption and a host of other related issues.
-- When Oracle internal job failed with specific exception
Note: There are lots of reason for ORA-07445, Based of arguments and oracle document you can fix it. So may bugs are described in oracle document for ORA-07445.
ORA-01555: snapshot too old: rollback segment number 0 with name "SYSTEM" too small
ORA-01555: snapshot too old: rollback segment number 0 with name "SYSTEM" too small
Query to execute to find issued tablespace:
select * from(
SELECT e.owner, e.segment_type, e.segment_name, e.partition_name, c.file#
, greatest(e.block_id, c.block#) corr_start_block#
, least(e.block_id+e.blocks-1, c.block#+c.blocks-1) corr_end_block#
, least(e.block_id+e.blocks-1, c.block#+c.blocks-1)
- greatest(e.block_id, c.block#) + 1 blocks_corrupted
, null description
FROM dba_extents e, v$database_block_corruption c
WHERE e.file_id = c.file#
AND e.block_id <= c.block# + c.blocks - 1
AND e.block_id + e.blocks - 1 >= c.block#
UNION
SELECT s.owner, s.segment_type, s.segment_name, s.partition_name, c.file#
, header_block corr_start_block#
, header_block corr_end_block#
, 1 blocks_corrupted
, 'Segment Header' description
FROM dba_segments s, v$database_block_corruption c
WHERE s.header_file = c.file#
AND s.segment_name is NOT NULL
AND s.header_block between c.block# and c.block# + c.blocks - 1
UNION
SELECT null owner, null segment_type, null segment_name, null partition_name, c.file#
, greatest(f.block_id, c.block#) corr_start_block#
, least(f.block_id+f.blocks-1, c.block#+c.blocks-1) corr_end_block#
, least(f.block_id+f.blocks-1, c.block#+c.blocks-1)
- greatest(f.block_id, c.block#) + 1 blocks_corrupted
, 'Free Block' description
FROM dba_free_space f, v$database_block_corruption c
WHERE f.file_id = c.file#
AND f.block_id <= c.block# + c.blocks - 1
AND f.block_id + f.blocks - 1 >= c.block#
order by file#, corr_start_block#) t where segment_name IS NOT NULL;
Solution with workaround:
Force an extension of the SYSTEM rollback segment to occur using the following :
connect / as sysdba
alter system set undo_management = MANUAL scope=spfile ;
shutdown immediate ;
startup ;
create table sample (c1 number, c2 varchar2(10));
begin
for i in 1.. 400000 loop
insert into sample values (i,'ABCDEFGH');
end loop;
end;
/
delete sample;
commit;
alter system set undo_management = AUTO scope=spfile;
shutdown immediate
startup
Query to execute to find issued tablespace:
select * from(
SELECT e.owner, e.segment_type, e.segment_name, e.partition_name, c.file#
, greatest(e.block_id, c.block#) corr_start_block#
, least(e.block_id+e.blocks-1, c.block#+c.blocks-1) corr_end_block#
, least(e.block_id+e.blocks-1, c.block#+c.blocks-1)
- greatest(e.block_id, c.block#) + 1 blocks_corrupted
, null description
FROM dba_extents e, v$database_block_corruption c
WHERE e.file_id = c.file#
AND e.block_id <= c.block# + c.blocks - 1
AND e.block_id + e.blocks - 1 >= c.block#
UNION
SELECT s.owner, s.segment_type, s.segment_name, s.partition_name, c.file#
, header_block corr_start_block#
, header_block corr_end_block#
, 1 blocks_corrupted
, 'Segment Header' description
FROM dba_segments s, v$database_block_corruption c
WHERE s.header_file = c.file#
AND s.segment_name is NOT NULL
AND s.header_block between c.block# and c.block# + c.blocks - 1
UNION
SELECT null owner, null segment_type, null segment_name, null partition_name, c.file#
, greatest(f.block_id, c.block#) corr_start_block#
, least(f.block_id+f.blocks-1, c.block#+c.blocks-1) corr_end_block#
, least(f.block_id+f.blocks-1, c.block#+c.blocks-1)
- greatest(f.block_id, c.block#) + 1 blocks_corrupted
, 'Free Block' description
FROM dba_free_space f, v$database_block_corruption c
WHERE f.file_id = c.file#
AND f.block_id <= c.block# + c.blocks - 1
AND f.block_id + f.blocks - 1 >= c.block#
order by file#, corr_start_block#) t where segment_name IS NOT NULL;
Solution with workaround:
Force an extension of the SYSTEM rollback segment to occur using the following :
connect / as sysdba
alter system set undo_management = MANUAL scope=spfile ;
shutdown immediate ;
startup ;
create table sample (c1 number, c2 varchar2(10));
begin
for i in 1.. 400000 loop
insert into sample values (i,'ABCDEFGH');
end loop;
end;
/
delete sample;
commit;
alter system set undo_management = AUTO scope=spfile;
shutdown immediate
startup
ORA-01555 Snapshot Too Old
ORA-01555 Snapshot Too Old
The ORA-01555 is caused by Oracle read consistency mechanism. If you have a long running SQL that starts at 10:30 AM, Oracle ensures that all rows are as they appeared at 10:30 AM, even if the query runs until noon! Oracles does this by reading the "before image" of changed rows from the online undo segments. If you have lots of updates, long running SQL and too small UNDO, the ORA-01555 error will appear.
From the docs we see that the ORA-01555 error relates to insufficient undo storage or a too small value for the undo_retention parameter:
ORA-01555: snapshot too old: rollback segment number string with name "string" too small
Cause: Rollback records needed by a reader for consistent read are overwritten by other writers.
Action: If in Automatic Undo Management mode, increase the setting of UNDO_RETENTION. Otherwise, use larger rollback segments.
Click here to read : how to set optimal value for undo retention and undo tablespace size
If you are facing following error for the below query, then do the my suggested action plan. I rectified the issue in same way.
The ORA-01555 is caused by Oracle read consistency mechanism. If you have a long running SQL that starts at 10:30 AM, Oracle ensures that all rows are as they appeared at 10:30 AM, even if the query runs until noon! Oracles does this by reading the "before image" of changed rows from the online undo segments. If you have lots of updates, long running SQL and too small UNDO, the ORA-01555 error will appear.
From the docs we see that the ORA-01555 error relates to insufficient undo storage or a too small value for the undo_retention parameter:
ORA-01555: snapshot too old: rollback segment number string with name "string" too small
Cause: Rollback records needed by a reader for consistent read are overwritten by other writers.
Action: If in Automatic Undo Management mode, increase the setting of UNDO_RETENTION. Otherwise, use larger rollback segments.
Click here to read : how to set optimal value for undo retention and undo tablespace size
If you are facing following error for the below query, then do the my suggested action plan. I rectified the issue in same way.
ORA-03113: end-of-file on communication channel
ORA-03113: end-of-file on communication channel
This error pretty much means that your connection has clutched its chest and died. For some reason, your client machine and the database server are acting like an old married couple and have stopped talking to each other. That reason could be one of a rather long list: has your server crashed? has someone pulled out your network cable? was your process killed at the O/S level? is your Windows log full? or maybe there is an Oracle internal error?
Do not overlook the obvious. This error is sometimes caused by the simplest of things. If, however, it is caused by an Oracle internal error, look to your alert log for further information.
This error pretty much means that your connection has clutched its chest and died. For some reason, your client machine and the database server are acting like an old married couple and have stopped talking to each other. That reason could be one of a rather long list: has your server crashed? has someone pulled out your network cable? was your process killed at the O/S level? is your Windows log full? or maybe there is an Oracle internal error?
Do not overlook the obvious. This error is sometimes caused by the simplest of things. If, however, it is caused by an Oracle internal error, look to your alert log for further information.
ORA-00600: internal error code, arguments: [%s], [%s],[%s], [%s], [%s]
ORA-00600: internal error code, arguments: [%s], [%s],[%s], [%s], [%s]
Cause : This is a generic error; it means something serious has gone wrong and you are going to need to roll up your sleeves, dig in, and find out what. But you are not without clues. Your alert.log file will contain the path to your trace file. You will want to look in it, as a record is written to the trace file every time an ORA-00600 error occurs.
Take the information you get from your trace file and the first argument in the square brackets (the internal message number), and head over to My Oracle Support (Metalink). There you will find a handy ORA-0600 lookup tool (Note 153788.1) that will direct you to additional information that will help you solve your problem.
Action : Check with Oracle support as per your version and arguments
Note: There are lots of reason for ORA-00600, Based of arguments and oracle document you can fix it. So may bugs are described in oracle document for ORA-00600.
Cause : This is a generic error; it means something serious has gone wrong and you are going to need to roll up your sleeves, dig in, and find out what. But you are not without clues. Your alert.log file will contain the path to your trace file. You will want to look in it, as a record is written to the trace file every time an ORA-00600 error occurs.
Take the information you get from your trace file and the first argument in the square brackets (the internal message number), and head over to My Oracle Support (Metalink). There you will find a handy ORA-0600 lookup tool (Note 153788.1) that will direct you to additional information that will help you solve your problem.
Action : Check with Oracle support as per your version and arguments
Note: There are lots of reason for ORA-00600, Based of arguments and oracle document you can fix it. So may bugs are described in oracle document for ORA-00600.
ORA-12154: TNS:could not resolve the connect identifier specified
Cause : This error is, almost appropriately, often the very first one you get on trying to establish a connection to your database. Simply put, it means that you have named the database you wish to be connected to and Oracle doesn’t know who the heck you’re talking about. This error is often caused by typos, maybe in your connection string, but possibly in your tnsnames.ora file. It is also possible that the tnsnames.ora file is not accessible or does not even exist. If it does, ensure that it contains the service name you are using; also go over it with a fine toothcomb to make sure it doesn’t have any unpaired parentheses or such.
Action : Cross Check tns entry, Check firwall access to connecting server
Action : Cross Check tns entry, Check firwall access to connecting server
27 Haziran 2013 Perşembe
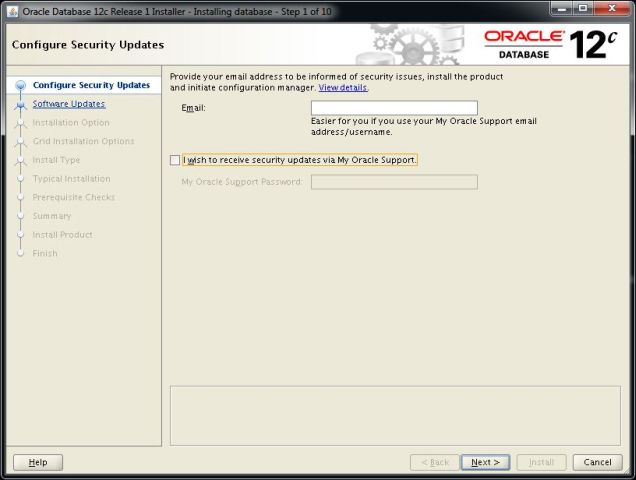
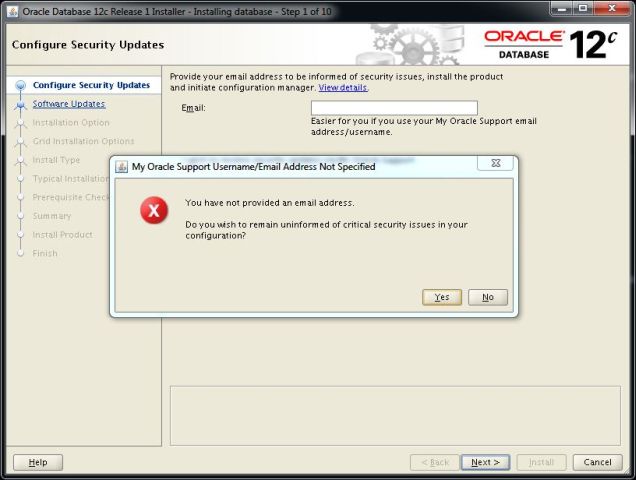
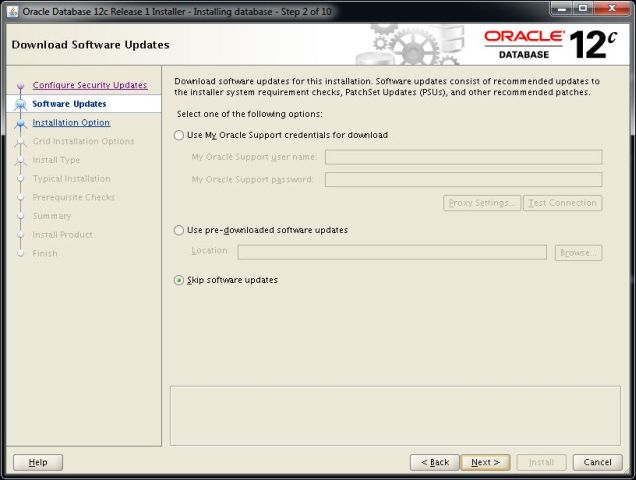
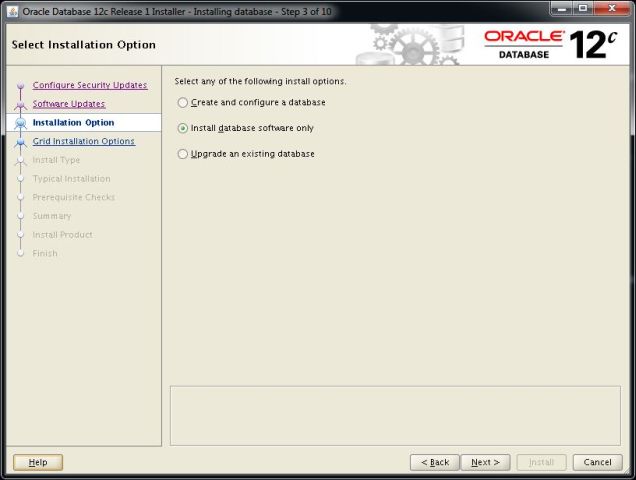
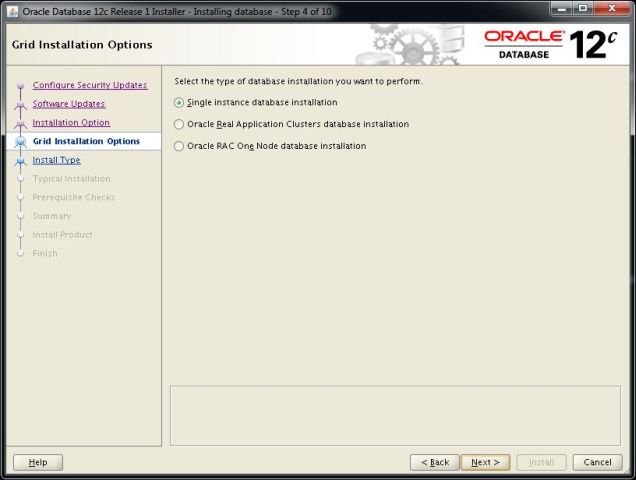
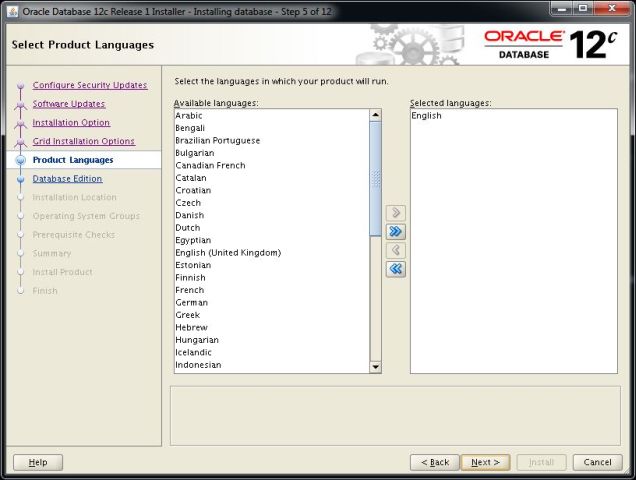
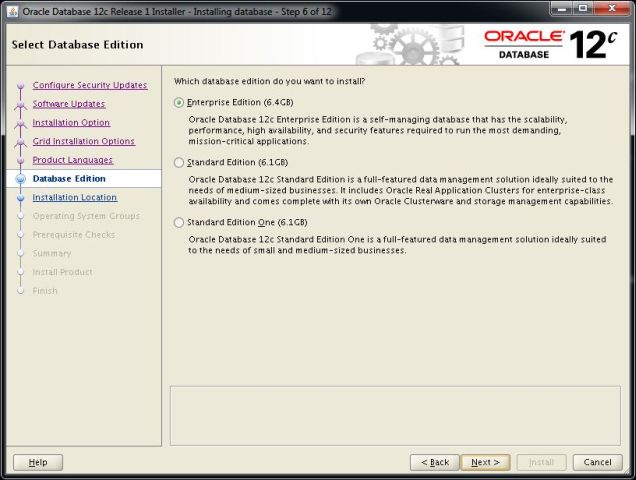
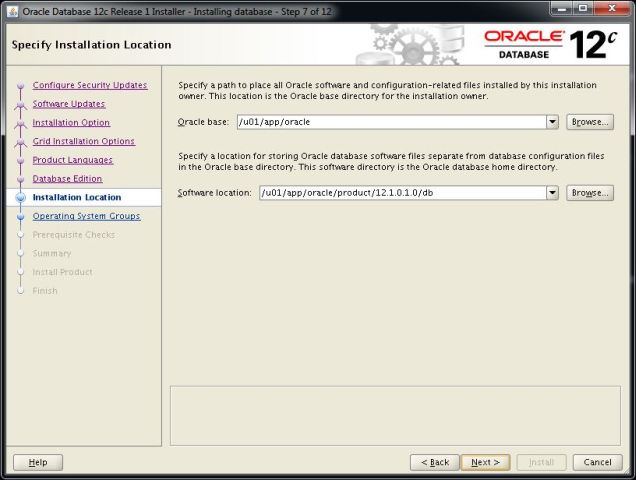
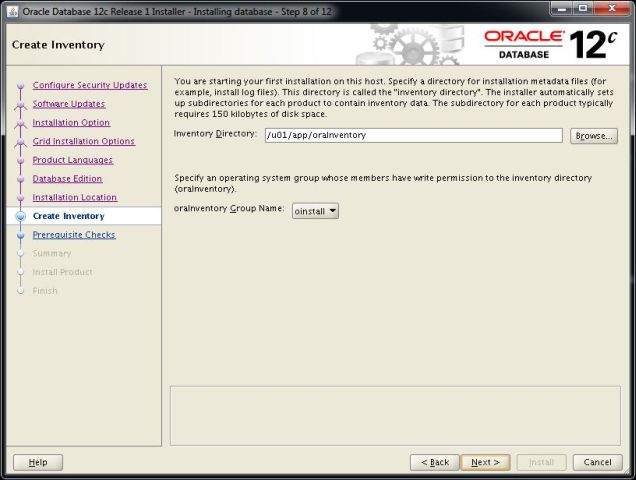
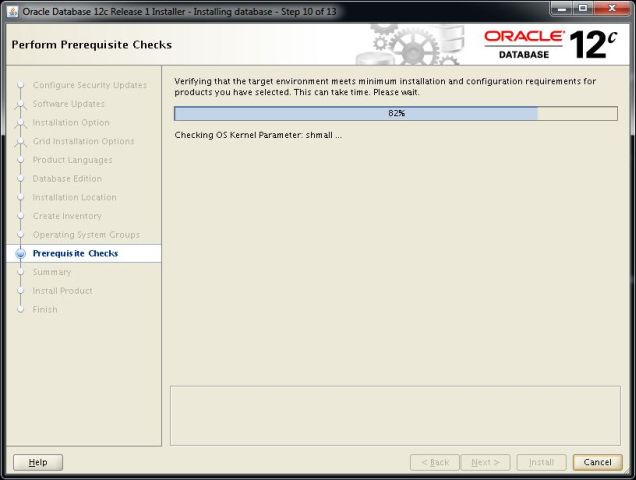
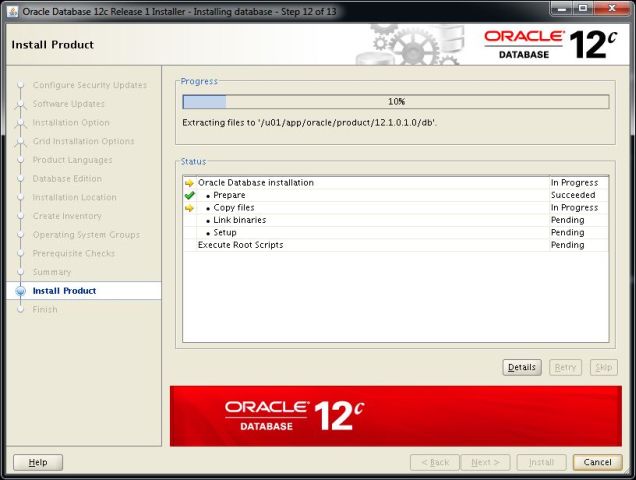
Oracle Database 12c Linux üzerine kurulumu
Merhaba bu yazımızda oracle'ın yeni tanıttıgı Database 12c kurulumu OEL linux 6.3 üzerinde yapacagız.
Linux için yapılan ayarlar 11g r2 ile aynı çok bir farkı yok.
sd
asd
as
sdd
asd
sd
asds
asd
asd
asd

asdsa
asdasd

dsd
dfs
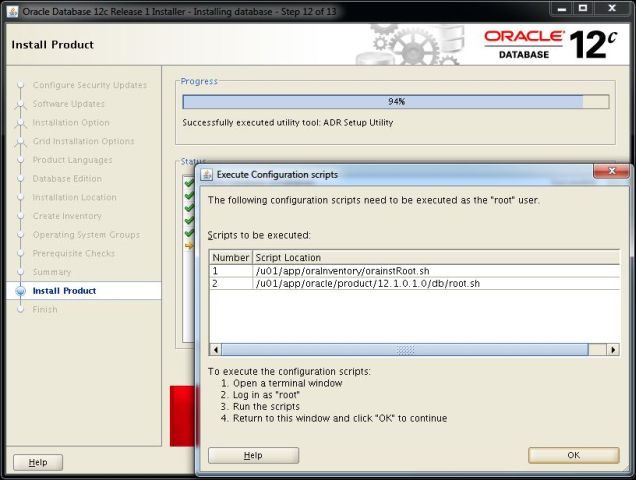
fdfs
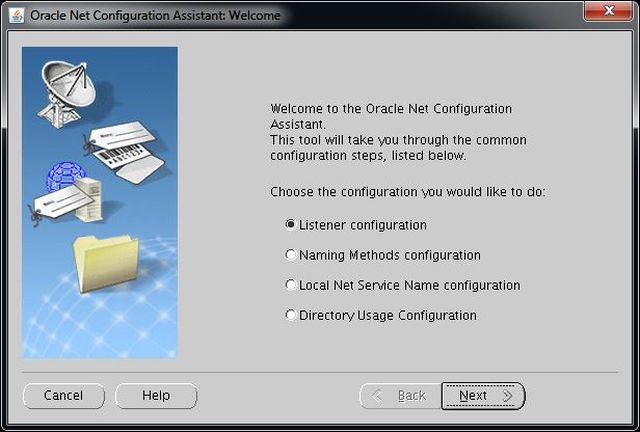
sdfds
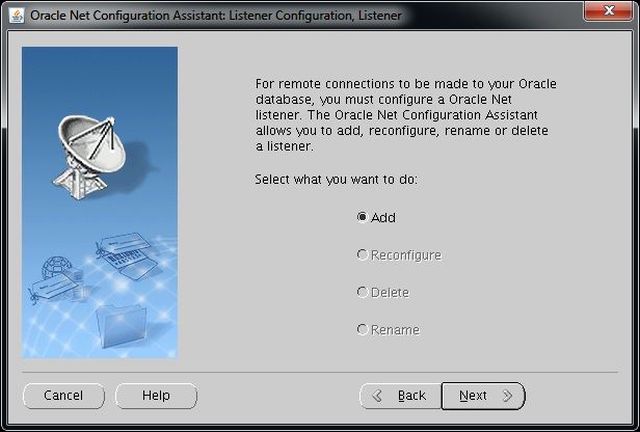
ewrewr
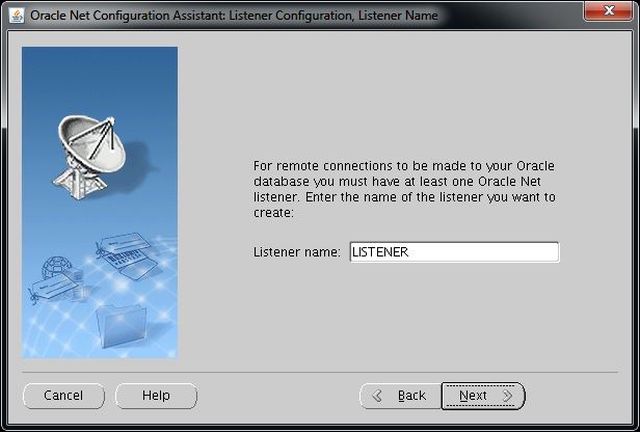
sds
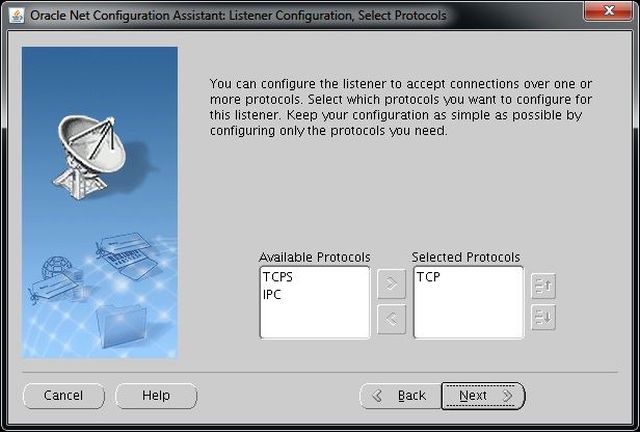
ere

wqe

sdsa
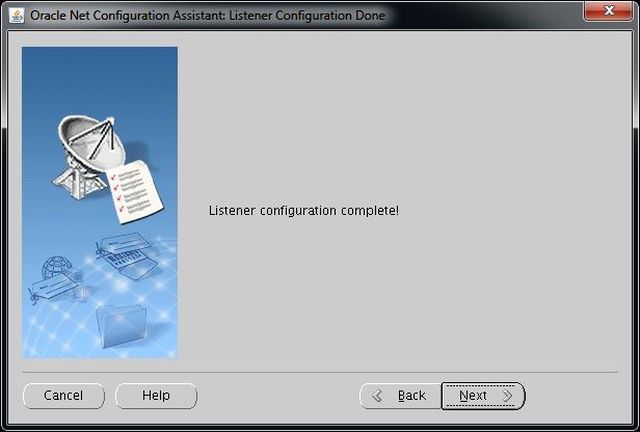
asdasd
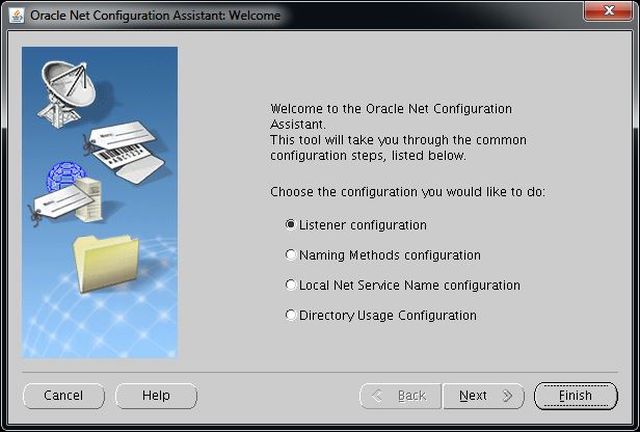
dbca
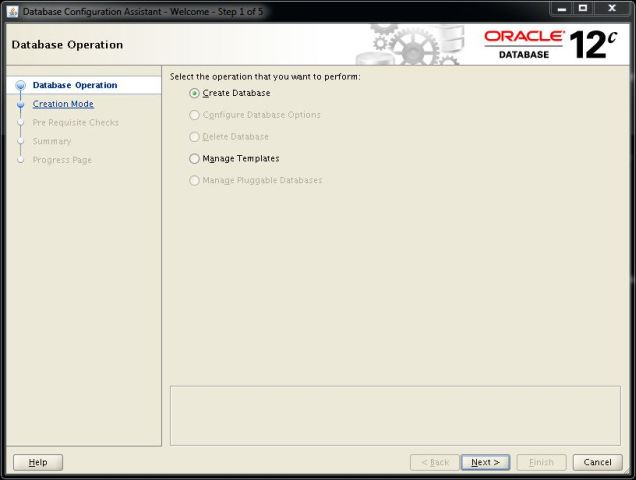
dfdsfds
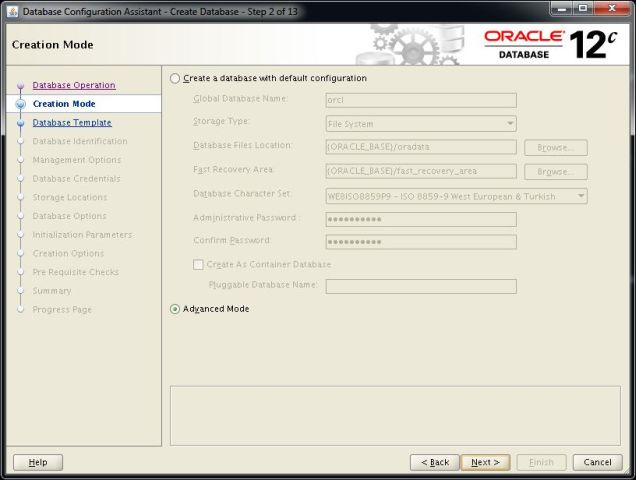
sdfds
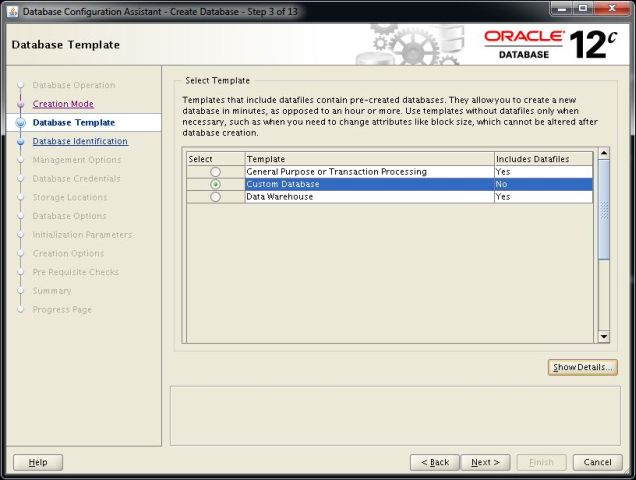
sdfdsf

dsfds

sdfdsf
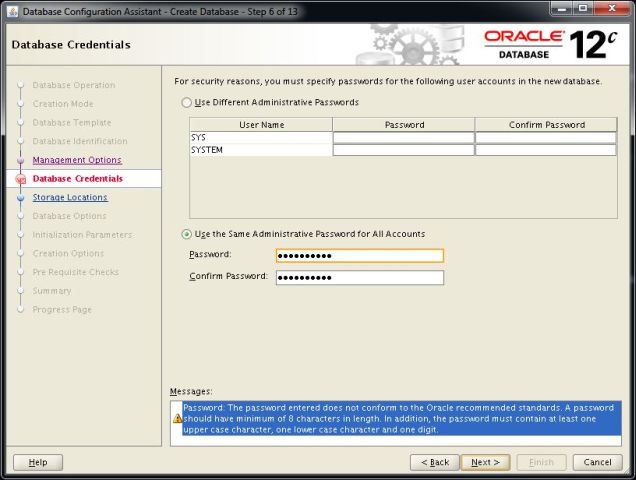
asdsad
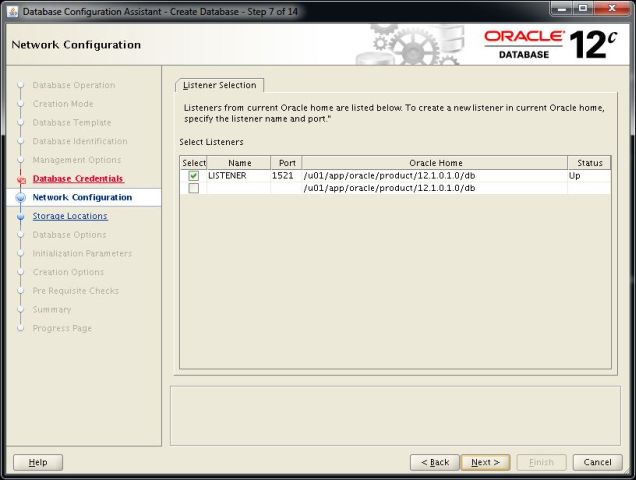
asdsad

asdsad
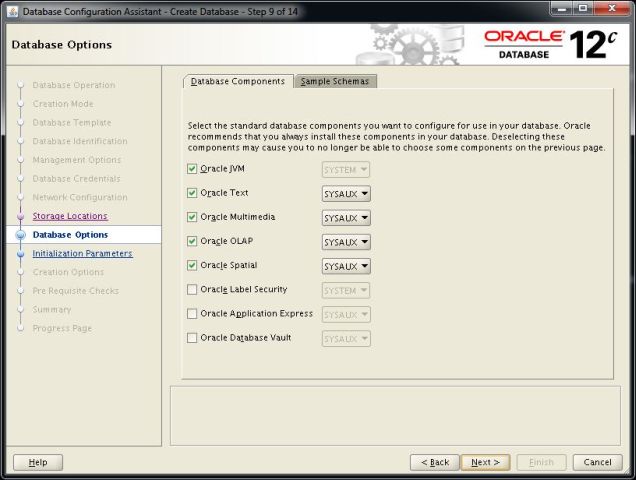
erew
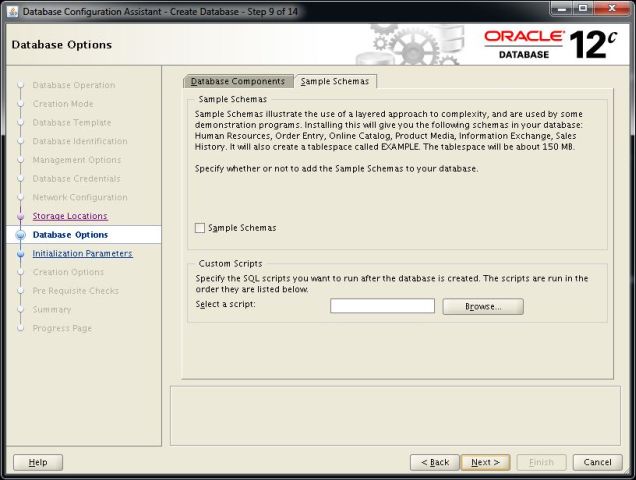
werrew
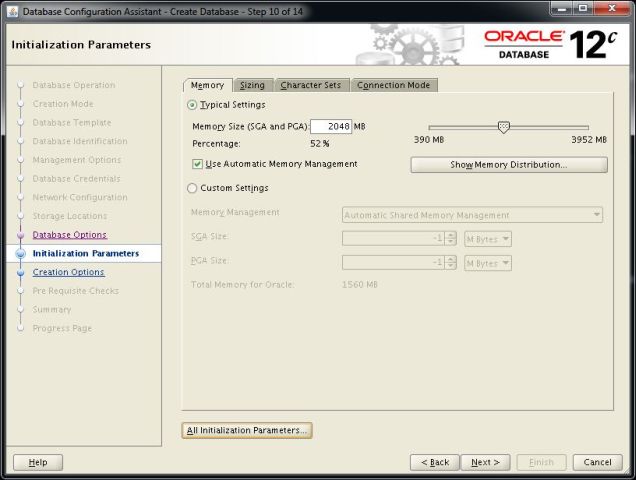
dsfd
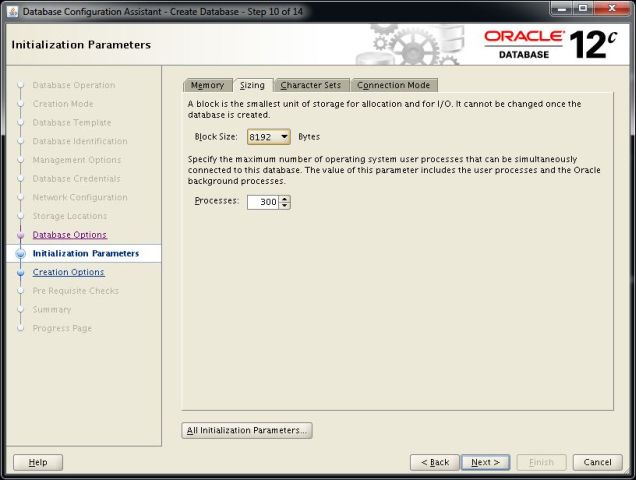
dfds
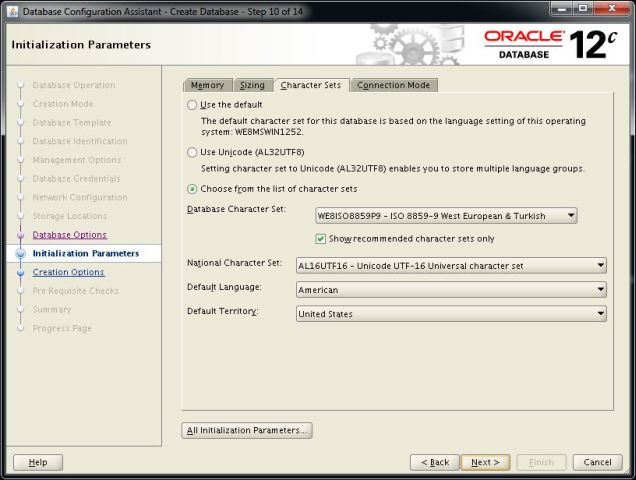
ewr
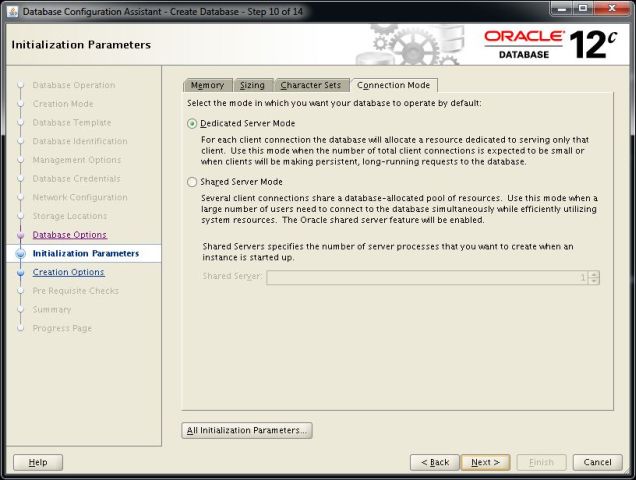
dfds
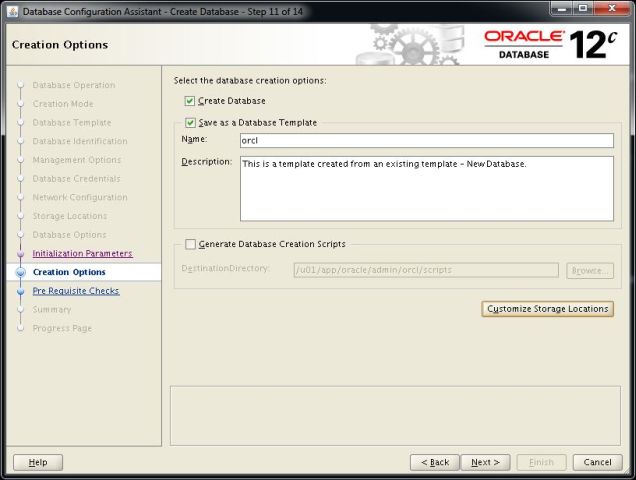
asds
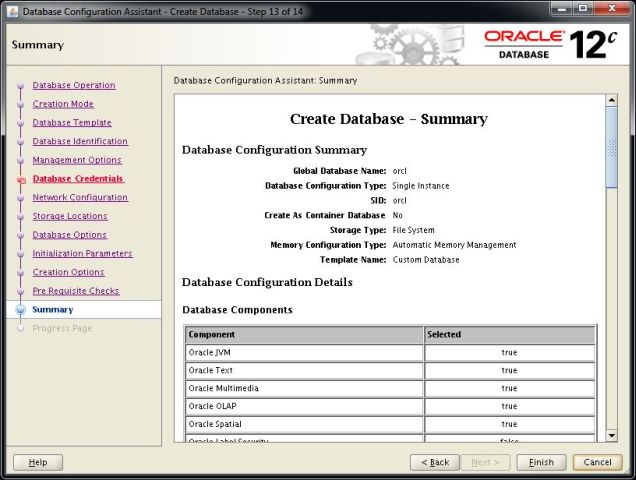
asdsa
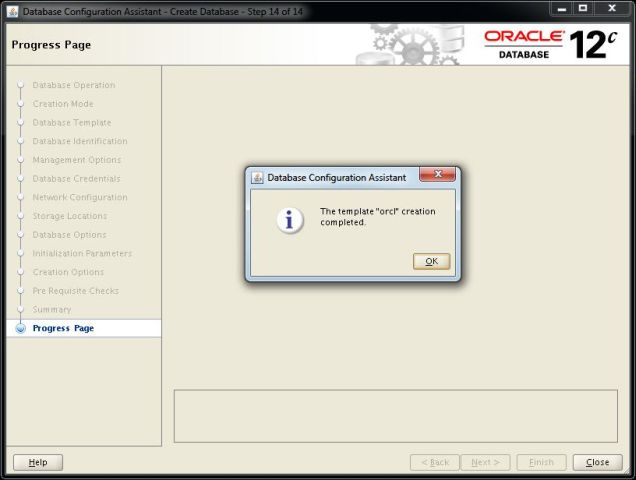
asd
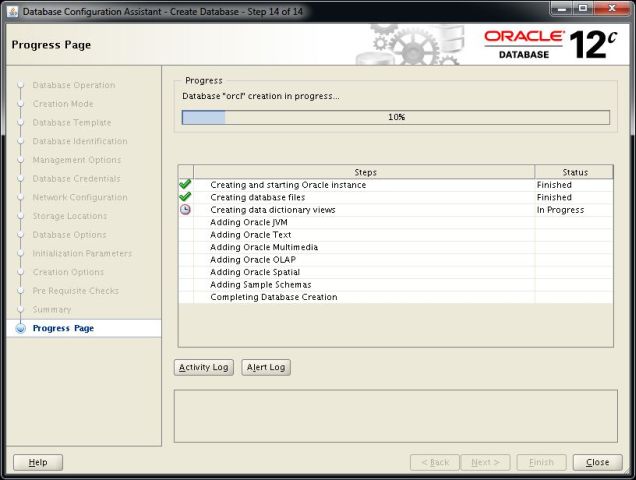
fdg

sdfds
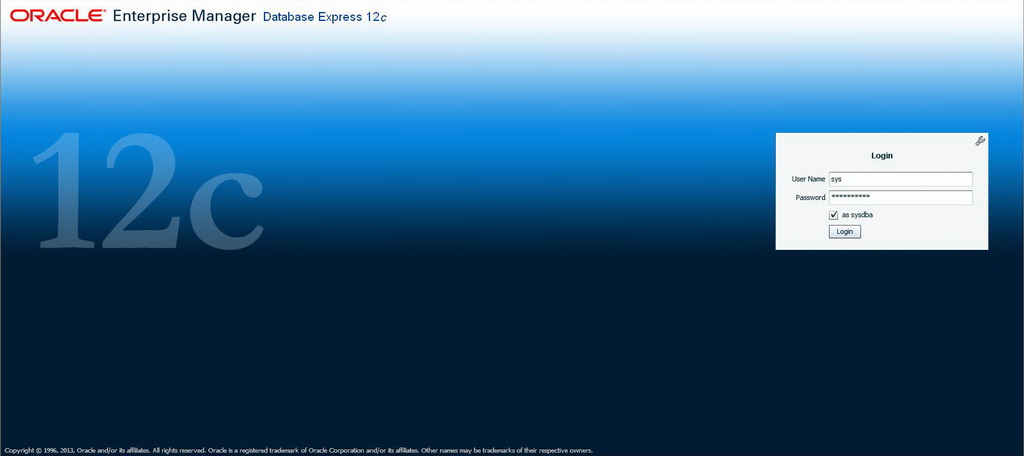
sads

Linux için yapılan ayarlar 11g r2 ile aynı çok bir farkı yok.
sd
asd
as
sdd
asd
sd
asds
asd
asd
asd
asdsa
asdasd
dsd
dfs
fdfs
sdfds
ewrewr
sds
ere
wqe
sdsa
asdasd
dbca
dfdsfds
sdfds
sdfdsf
dsfds
sdfdsf
asdsad
asdsad
asdsad
erew
werrew
dsfd
dfds
ewr
dfds
asds
asdsa
asd
fdg
sdfds
sads

5 Nisan 2013 Cuma
PRVF-4007 : User equivalence check failed for user oracle
RAC kurulumda, ortamlarin kuruluma hazir olup olmadigi anlamak icin, asagidaki gibi testler yapariz bu testleri yaparken yukaridaki gibi hata aliyorsaniz, asagidaki adimlari takip etmelisiniz.
[oracle@rac1 grid]$ ./runcluvfy.sh stage -pre crsinst -n rac1,RACG2 -r 11gR2 -fixup -verbose
Performing pre-checks for cluster services setup
Checking node reachability...
Check: Node reachability from node "rac1"
Destination Node Reachable?
------------------------------------ ------------------------
rac1 yes
RACG2 yes
Result: Node reachability check passed from node "rac1"
Checking user equivalence...
Check: User equivalence for user "oracle"
Node Name Comment
------------------------------------ ------------------------
rac1 failed
RACG2 failed
Result: PRVF-4007 : User equivalence check failed for user "oracle"
ERROR:
User equivalence unavailable on all the specified nodes
Verification cannot proceed
Pre-check for cluster services setup was unsuccessful on all the nodes.
-- TO AVOID
PRVF-4007 : User equivalence check failed for user "oracle
SETUP SSH USER EQUIVALENCE IN 11GR2
In new 11GR2 ssh User equivalence can be setup as below.
[oracle@rac1 grid]$ ll
total 40
drwxrwxrwx 9 oracle oinstall 4096 Apr 1 08:11 doc
drwxrwxrwx 4 oracle oinstall 4096 Apr 1 08:11 install
drwxrwxrwx 2 oracle oinstall 4096 Apr 1 08:11 response
drwxrwxrwx 2 oracle oinstall 4096 Apr 1 08:11 rpm
-rwxrwxrwx 1 oracle oinstall 3795 Apr 1 08:11 runcluvfy.sh
-rwxrwxrwx 1 oracle oinstall 3227 Apr 1 08:11 runInstaller
drwxrwxrwx 2 oracle oinstall 4096 Apr 1 09:05 sshsetup
drwxrwxrwx 14 oracle oinstall 4096 Apr 1 08:11 stage
-rwxrwxrwx 1 oracle oinstall 4228 Apr 1 08:11 welcome.html
cd sshsetup
./sshUserSetup.sh -user oracle -hosts rac1,rac2 -advanced -exverify -confirm
Below is method to setup ssh Manually step-by-step.
ON NODE-1
rac1@:/home/oracle : $mkdir -p ~/.ssh
rac1@:/home/oracle : $chmod 700 ~/.ssh
rac1@:/home/oracle : $/usr/bin/ssh-keygen -t rsa
Generating public/private rsa key pair.
Enter file in which to save the key (/home/oracle/.ssh/id_rsa):
Enter passphrase (empty for no passphrase):
Enter same passphrase again:
Your identification has been saved in /home/oracle/.ssh/id_rsa.
Your public key has been saved in /home/oracle/.ssh/id_rsa.pub.
The key fingerprint is:
4a:3b:fe:ea:03:d3:cf:6f:d3:06:fb:1a:ed:1e:b0:6b oracle@rac1.localdomain.com
rac1@:/home/oracle : $/usr/bin/ssh-keygen -t dsa
Generating public/private dsa key pair.
Enter file in which to save the key (/home/oracle/.ssh/id_dsa):
Enter passphrase (empty for no passphrase):
Enter same passphrase again:
Your identification has been saved in /home/oracle/.ssh/id_dsa.
Your public key has been saved in /home/oracle/.ssh/id_dsa.pub.
The key fingerprint is:
5e:cb:46:cc:d8:f1:01:44:3e:7a:20:eb:ce:5d:d4:15 oracle@rac1.localdomain.com
ON NODE-2
rac2@:/home/oracle : $mkdir -p ~/.ssh
rac2@:/home/oracle : $chmod 700 ~/.ssh
rac2@:/home/oracle : $/usr/bin/ssh-keygen -t rsa
Generating public/private rsa key pair.
Enter file in which to save the key (/home/oracle/.ssh/id_rsa):
Enter passphrase (empty for no passphrase):
Enter same passphrase again:
Your identification has been saved in /home/oracle/.ssh/id_rsa.
Your public key has been saved in /home/oracle/.ssh/id_rsa.pub.
The key fingerprint is:
dc:4e:e7:c3:ee:71:84:e7:2e:72:99:3d:b0:0a:2b:f9 oracle@rac2.localdomain.com
rac2@:/home/oracle : $/usr/bin/ssh-keygen -t dsa
Generating public/private dsa key pair.
Enter file in which to save the key (/home/oracle/.ssh/id_dsa):
Enter passphrase (empty for no passphrase):
Enter same passphrase again:
Your identification has been saved in /home/oracle/.ssh/id_dsa.
Your public key has been saved in /home/oracle/.ssh/id_dsa.pub.
The key fingerprint is:
5a:49:d4:e2:b9:5d:e9:f8:f5:bb:ce:7c:4b:f4:dd:6c oracle@rac2.localdomain.com
ON NODE-1
rac1@:/home/oracle : $ssh rac1 cat ~/.ssh/id_rsa.pub >> ~/.ssh/authorized_keys
The authenticity of host 'rac1 (192.168.100.181)' can't be established.
RSA key fingerprint is 27:ac:4b:9a:e3:d2:ae:6d:2b:71:99:8d:b9:c0:b1:a7.
Are you sure you want to continue connecting (yes/no)? yes
Warning: Permanently added 'rac1,192.168.100.181' (RSA) to the list of known hosts.
oracle@rac1's password:
rac1@:/home/oracle : $ssh rac1 cat ~/.ssh/id_dsa.pub >> ~/.ssh/authorized_keys
rac1@:/home/oracle : $scp /home/oracle/.ssh/authorized_keys oracle@rac2:~/.ssh/
oracle@rac2's password:
authorized_keys 100% 1030 1.0KB/s 00:00
ON NODE-2
rac2@:/home/oracle/.ssh : $ssh rac2 cat ~/.ssh/id_rsa.pub >> ~/.ssh/authorized_keys
The authenticity of host 'rac2 (192.168.100.182)' can't be established.
RSA key fingerprint is 27:ac:4b:9a:e3:d2:ae:6d:2b:71:99:8d:b9:c0:b1:a7.
Are you sure you want to continue connecting (yes/no)? yes
Warning: Permanently added 'rac2,192.168.100.182' (RSA) to the list of known hosts.
oracle@rac2's password:
rac2@:/home/oracle/.ssh : $ssh rac2 cat ~/.ssh/id_dsa.pub >> ~/.ssh/authorized_keys
rac2@:/home/oracle/.ssh : $scp /home/oracle/.ssh/authorized_keys oracle@rac1:~/.ssh/
The authenticity of host 'rac1 (192.168.100.181)' can't be established.
RSA key fingerprint is 27:ac:4b:9a:e3:d2:ae:6d:2b:71:99:8d:b9:c0:b1:a7.
Are you sure you want to continue connecting (yes/no)? yes
Warning: Permanently added 'rac1,192.168.100.181' (RSA) to the list of known hosts.
oracle@rac1's password:
authorized_keys 100% 2060 2.0KB/s 00:00
--Confirm ssh on both Nodes.
rac1@:/home/oracle : $ssh rac2 date
Mon Aug 6 09:20:48 EDT 2012
rac1@:/home/oracle : $ssh rac1 date
Mon Aug 6 09:20:43 EDT 2012
rac2@:/home/oracle/.ssh : $ssh rac2 date
Mon Aug 6 09:20:37 EDT 2012
rac2@:/home/oracle/.ssh : $ssh rac1 date
Mon Aug 6 09:20:31 EDT 2012
[oracle@rac1 grid]$ ./runcluvfy.sh stage -pre crsinst -n rac1,RACG2 -r 11gR2 -fixup -verbose
Performing pre-checks for cluster services setup
Checking node reachability...
Check: Node reachability from node "rac1"
Destination Node Reachable?
------------------------------------ ------------------------
rac1 yes
RACG2 yes
Result: Node reachability check passed from node "rac1"
Checking user equivalence...
Check: User equivalence for user "oracle"
Node Name Comment
------------------------------------ ------------------------
rac1 failed
RACG2 failed
Result: PRVF-4007 : User equivalence check failed for user "oracle"
ERROR:
User equivalence unavailable on all the specified nodes
Verification cannot proceed
Pre-check for cluster services setup was unsuccessful on all the nodes.
-- TO AVOID
PRVF-4007 : User equivalence check failed for user "oracle
SETUP SSH USER EQUIVALENCE IN 11GR2
In new 11GR2 ssh User equivalence can be setup as below.
[oracle@rac1 grid]$ ll
total 40
drwxrwxrwx 9 oracle oinstall 4096 Apr 1 08:11 doc
drwxrwxrwx 4 oracle oinstall 4096 Apr 1 08:11 install
drwxrwxrwx 2 oracle oinstall 4096 Apr 1 08:11 response
drwxrwxrwx 2 oracle oinstall 4096 Apr 1 08:11 rpm
-rwxrwxrwx 1 oracle oinstall 3795 Apr 1 08:11 runcluvfy.sh
-rwxrwxrwx 1 oracle oinstall 3227 Apr 1 08:11 runInstaller
drwxrwxrwx 2 oracle oinstall 4096 Apr 1 09:05 sshsetup
drwxrwxrwx 14 oracle oinstall 4096 Apr 1 08:11 stage
-rwxrwxrwx 1 oracle oinstall 4228 Apr 1 08:11 welcome.html
cd sshsetup
./sshUserSetup.sh -user oracle -hosts rac1,rac2 -advanced -exverify -confirm
Below is method to setup ssh Manually step-by-step.
ON NODE-1
rac1@:/home/oracle : $mkdir -p ~/.ssh
rac1@:/home/oracle : $chmod 700 ~/.ssh
rac1@:/home/oracle : $/usr/bin/ssh-keygen -t rsa
Generating public/private rsa key pair.
Enter file in which to save the key (/home/oracle/.ssh/id_rsa):
Enter passphrase (empty for no passphrase):
Enter same passphrase again:
Your identification has been saved in /home/oracle/.ssh/id_rsa.
Your public key has been saved in /home/oracle/.ssh/id_rsa.pub.
The key fingerprint is:
4a:3b:fe:ea:03:d3:cf:6f:d3:06:fb:1a:ed:1e:b0:6b oracle@rac1.localdomain.com
rac1@:/home/oracle : $/usr/bin/ssh-keygen -t dsa
Generating public/private dsa key pair.
Enter file in which to save the key (/home/oracle/.ssh/id_dsa):
Enter passphrase (empty for no passphrase):
Enter same passphrase again:
Your identification has been saved in /home/oracle/.ssh/id_dsa.
Your public key has been saved in /home/oracle/.ssh/id_dsa.pub.
The key fingerprint is:
5e:cb:46:cc:d8:f1:01:44:3e:7a:20:eb:ce:5d:d4:15 oracle@rac1.localdomain.com
ON NODE-2
rac2@:/home/oracle : $mkdir -p ~/.ssh
rac2@:/home/oracle : $chmod 700 ~/.ssh
rac2@:/home/oracle : $/usr/bin/ssh-keygen -t rsa
Generating public/private rsa key pair.
Enter file in which to save the key (/home/oracle/.ssh/id_rsa):
Enter passphrase (empty for no passphrase):
Enter same passphrase again:
Your identification has been saved in /home/oracle/.ssh/id_rsa.
Your public key has been saved in /home/oracle/.ssh/id_rsa.pub.
The key fingerprint is:
dc:4e:e7:c3:ee:71:84:e7:2e:72:99:3d:b0:0a:2b:f9 oracle@rac2.localdomain.com
rac2@:/home/oracle : $/usr/bin/ssh-keygen -t dsa
Generating public/private dsa key pair.
Enter file in which to save the key (/home/oracle/.ssh/id_dsa):
Enter passphrase (empty for no passphrase):
Enter same passphrase again:
Your identification has been saved in /home/oracle/.ssh/id_dsa.
Your public key has been saved in /home/oracle/.ssh/id_dsa.pub.
The key fingerprint is:
5a:49:d4:e2:b9:5d:e9:f8:f5:bb:ce:7c:4b:f4:dd:6c oracle@rac2.localdomain.com
ON NODE-1
rac1@:/home/oracle : $ssh rac1 cat ~/.ssh/id_rsa.pub >> ~/.ssh/authorized_keys
The authenticity of host 'rac1 (192.168.100.181)' can't be established.
RSA key fingerprint is 27:ac:4b:9a:e3:d2:ae:6d:2b:71:99:8d:b9:c0:b1:a7.
Are you sure you want to continue connecting (yes/no)? yes
Warning: Permanently added 'rac1,192.168.100.181' (RSA) to the list of known hosts.
oracle@rac1's password:
rac1@:/home/oracle : $ssh rac1 cat ~/.ssh/id_dsa.pub >> ~/.ssh/authorized_keys
rac1@:/home/oracle : $scp /home/oracle/.ssh/authorized_keys oracle@rac2:~/.ssh/
oracle@rac2's password:
authorized_keys 100% 1030 1.0KB/s 00:00
ON NODE-2
rac2@:/home/oracle/.ssh : $ssh rac2 cat ~/.ssh/id_rsa.pub >> ~/.ssh/authorized_keys
The authenticity of host 'rac2 (192.168.100.182)' can't be established.
RSA key fingerprint is 27:ac:4b:9a:e3:d2:ae:6d:2b:71:99:8d:b9:c0:b1:a7.
Are you sure you want to continue connecting (yes/no)? yes
Warning: Permanently added 'rac2,192.168.100.182' (RSA) to the list of known hosts.
oracle@rac2's password:
rac2@:/home/oracle/.ssh : $ssh rac2 cat ~/.ssh/id_dsa.pub >> ~/.ssh/authorized_keys
rac2@:/home/oracle/.ssh : $scp /home/oracle/.ssh/authorized_keys oracle@rac1:~/.ssh/
The authenticity of host 'rac1 (192.168.100.181)' can't be established.
RSA key fingerprint is 27:ac:4b:9a:e3:d2:ae:6d:2b:71:99:8d:b9:c0:b1:a7.
Are you sure you want to continue connecting (yes/no)? yes
Warning: Permanently added 'rac1,192.168.100.181' (RSA) to the list of known hosts.
oracle@rac1's password:
authorized_keys 100% 2060 2.0KB/s 00:00
--Confirm ssh on both Nodes.
rac1@:/home/oracle : $ssh rac2 date
Mon Aug 6 09:20:48 EDT 2012
rac1@:/home/oracle : $ssh rac1 date
Mon Aug 6 09:20:43 EDT 2012
rac2@:/home/oracle/.ssh : $ssh rac2 date
Mon Aug 6 09:20:37 EDT 2012
rac2@:/home/oracle/.ssh : $ssh rac1 date
Mon Aug 6 09:20:31 EDT 2012
2 Nisan 2013 Salı
INS-40922 Invalid SCAN Name - unresolved to IP address
RAC kurulumda asagidaki hatayi aliyorsaniz, /etc/hosts icindeki scan name`i kontrol etmeniz gerekmektedir.

$ cat /etc/hostsburadaki scan ile ayni degerde yani "scan" yazmaniz gerekmektedir
# SCAN
20.20.20.55 scan.localdomain scan
23 Mart 2013 Cumartesi
ORA-00838: Specified value of MEMORY_TARGET is too small
ORA-00838: Specified value of MEMORY_TARGET, evet bu hatanin sebebi memory_target degerinin parametre dosyasi icindeki degerinin ihtiyacimiz olan degerden kucuk olmasi. Bir cok sebebi olabilir, mesala sga_target degeri yuksek verilmistir ve db yeniden baslatilirken, memory_target degeri kucuk ise verir vs.
SQL> create spfile from pfile='/home/oracle/pfile.ora';
File created.
cozum asagidaki adimlari yapabiliriz;
SQL> startup
ORA-00838: Specified value of MEMORY_TARGET is too small, needs to be at least 1172M
SQL> create pfile='/home/oracle/pfile.ora' from spfile;
File created.
spfile`den pfile olusturup, icindeki memory_target degerini yeniden veriyoruz.
$ vi '/home/oracle/pfile.ora'
*.memory_target=1300234240
daha sonra, pfile`den spfile olusturup veritabanimizi aciyoruz.
SQL> startup
ORACLE instance started.
Total System Global Area 534462464 bytes
Fixed Size 2212736 bytes
Variable Size 524291200 bytes
Database Buffers 4194304 bytes
Redo Buffers 3764224 bytes
Database mounted.
Database opened.
11 Mart 2013 Pazartesi
Virtual Box Uzerinde OCFS2 kurulumu
Merhaba, Baslik biraz kisa oldu :) aslinda baslik Virtualbox Uzerinde calistirdigimiz iki linux makine arasinda OCFS2 ile paylasilan disk nasil olusturabiliriz onu gorecegiz.
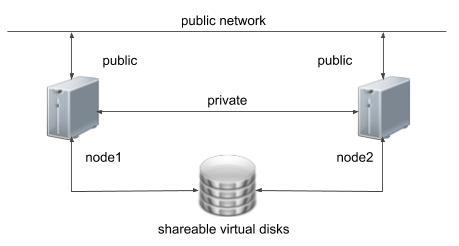
Ilk once, virtualbox uzerinde paylasilan(sharedable) bir disk olusturmali ve her iki makineye baglamaliyiz.
# Sonra disk olusturuyoruz
OCFS2 kurmak icin, linux makinemizin kernel versiyonunu ogrenerek indirip yukluyoruz.
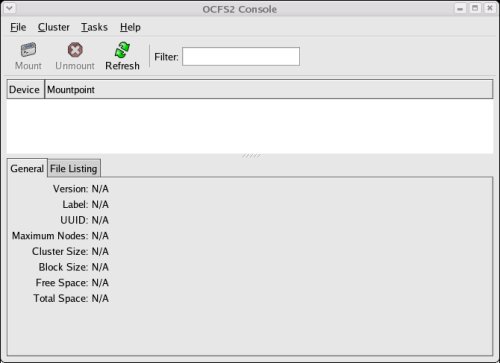
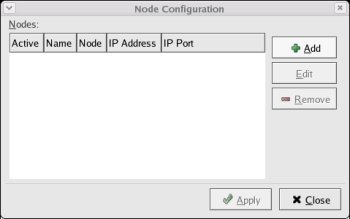
Sonra Cluster > Configure Nodes
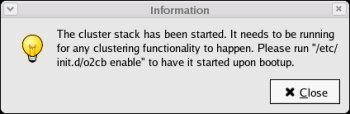
Burada kac tane node`umuz varsa onlarin hepsini ekliyoruz.

[root@wlserver1 /] ocfs2console
Menuden Tasks > Format
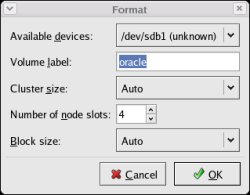
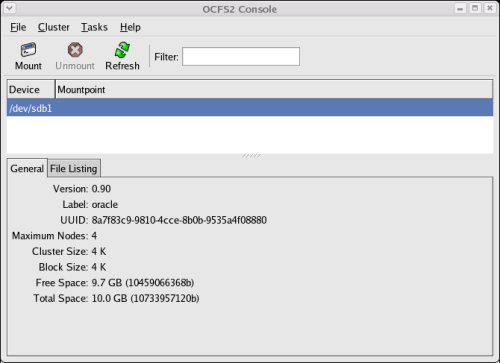
Gelen pencereden mount etmek istediginiz yolu seciyoruz.
Mountpoint : /paylasilan
ve son olarak diskimizi automount olabilmesi icin fstab altina ekliyoruz.
[root@wlserver1 /] vi /etc/fstab
~~~~~~~~~~~~~~~~~~~~~~ Yaptiklarimizi test etmek icin~~~~~~~~~~~~~~~~~~~~~~~
Herhangi bir node uzerinde /paylasilan adinda olusturdugumuz klasor icinde bir dosya olusturalim ve diger tarafda gorunecekmi bakalim.
~~~~~~~~~~~~~~~~~~~~~~~~~~~~~~~~~~~~~~~~~~~~~~~~~~~~~~~~~~~~~~~~~~~~~~~~
Burada mesala node1 kapatip actiginizda node2 bu alanda degisiklik yapabilecek ve node1 tekrar basladiginda node2`nin yaptigi degisiklikleri gorecektir.
Ilk once, virtualbox uzerinde paylasilan(sharedable) bir disk olusturmali ve her iki makineye baglamaliyiz.
1. Kendi makinemizde:
sudo bash
[sudo] password for easlan:
root@ertugrul:~# mkdir -p /storage/disk1
root@ertugrul:~# chmod -R 777 /storage/disk1
root@ertugrul:~# chmod -R 777 /storage/disk1
easlan@ertugrul:~$ cd /storage/disk1
# Sonra disk olusturuyoruz
easlan@ertugrul:/disk1$ VBoxManage createhd --filename sanaldisk.vdi --size 5120 -- format VDI --variant Fixed# Virtual Makinemize bagliyoruz.
0%...10%...20%...30%...40%...50%...60%...70%...80%...90%...100%
Disk image created. UUID: 5cd924a1-59ce-421c-b9c7-7a59769f4c3f
easlan@ertugrul:/disk1$ VBoxManage storageattach wlserver1 --storagectl "SATA Controller" --port 1 --device 0 --type hdd --medium sanaldisk.vdi --mtype shareable# Paylasilan yapiyoruz.
easlan@ertugrul:/disk1$ VBoxManage modifyhd sanaldisk.vdi --type shareable-- Ikinci Makine icin olusturdugumuz diski gosteriyoruz.
easlan@ertugrul:/disk1$ VBoxManage storageattach wlserver2 --storagectl "SATA Controller" --port 1 --device 0 --type hdd --medium sanaldisk.vdi --mtype shareablewlserver1 linux makinemiz icersinden :
[oracle@linux1 dev]$ cd /dev~ Sonra her iki makineyede OCFS2 kurariz.
[oracle@linux1 dev]$ ls sd*
sda sda1 sda2 sdb
OCFS2 kurmak icin, linux makinemizin kernel versiyonunu ogrenerek indirip yukluyoruz.
# rpm -Uvh ocfs2-2.6.18-194.el5-1.4.7-1.el5.x86_64.rpm \ ocfs2console-1.6.3-2.el5.x86_64.rpm \ ocfs2-tools-1.6.3-2.el5.x86_64.rpm \ ocfs2-tools-debuginfo-1.6.3-2.el5.x86_64.rpmSonra ocfs2console`u baslatiyoruz.
[root@wlserver1 /]# ocfs2console
Sonra Cluster > Configure Nodes
Burada kac tane node`umuz varsa onlarin hepsini ekliyoruz.
Icinden "/etc/init.d/o2cb" asagidakileri siliyoruz.
Asagidaki komutlari calistiyoruz.### BEGIN INIT INFO## Provides: o2cb## Required-Start: $network## Should-Start:## Required-Stop:## Default-Start: 2 3 5## Default-Stop:## Description: Load O2CB cluster services at system boot.### END INIT INFO
[root@wlserver1 /] chkconfig --del o2cb
[root@wlserver1 /] chkconfig --add o2cb
[root@wlserver1 /] chkconfig --list
o2cbo2cb 0:off 1:off 2:on 3:on 4:on 5:on 6:off[root@wlserver1 /] /etc/init.d/o2cb offline ocfs2
Cleaning heartbeat on ocfs2: OK
Stopping cluster ocfs2: OK
#
[root@wlserver1 /] /etc/init.d/o2cb unload
Unmounting ocfs2_dlmfs filesystem: OK
Unloading module "ocfs2_dlmfs": OK
Unmounting configfs filesystem: OK
Unloading module "configfs": OK
#
[root@wlserver1 /] /etc/init.d/o2cb configure
Configuring the O2CB driver.
This will configure the on-boot properties of the O2CB driver.
The following questions will determine whether the driver is loaded on
boot. The current values will be shown in brackets ('[]'). Hitting
without typing an answer will keep that current value. Ctrl-C
will abort.
Load O2CB driver on boot (y/n) [y]:
Cluster to start on boot (Enter "none" to clear) [ocfs2]:
Writing O2CB configuration: OK
Loading module "configfs": OK
Mounting configfs filesystem at /config: OK
Loading module "ocfs2_nodemanager": OK
Loading module "ocfs2_dlm": OK
Loading module "ocfs2_dlmfs": OK
Mounting ocfs2_dlmfs filesystem at /dlm: OK
Starting cluster ocfs2: OK
[root@wlserver1 /] cd /dev
[root@wlserver1 /] ls sd*
sda sda1 sda2 sdb
[root@wlserver1 /] fdisk /dev/sdbSonra ocfs2console yeninden aciyoruz ve diski mount edecez.
Device contains neither a valid DOS partition table, nor Sun, SGI or OSF disklabel
Building a new DOS disklabel. Changes will remain in memory only,
until you decide to write them. After that, of course, the previous
content won't be recoverable.
The number of cylinders for this disk is set to 1305.
There is nothing wrong with that, but this is larger than 1024,
and could in certain setups cause problems with:
1) software that runs at boot time (e.g., old versions of LILO)
2) booting and partitioning software from other OSs
(e.g., DOS FDISK, OS/2 FDISK)
Warning: invalid flag 0x0000 of partition table 4 will be corrected by w(rite)
Command (m for help): n
Command action
e extended
p primary partition (1-4)
p
Partition number (1-4): 1
First cylinder (1-1305, default 1):
Using default value 1
Last cylinder or +size or +sizeM or +sizeK (1-1305, default 1305):
Using default value 1305
Command (m for help): p
Disk /dev/sdb: 10.7 GB, 10737418240 bytes
255 heads, 63 sectors/track, 1305 cylinders
Units = cylinders of 16065 * 512 = 8225280 bytes
Device Boot Start End Blocks Id System
/dev/sdb1 1 1305 10482381 83 Linux
Command (m for help): w
The partition table has been altered!
Calling ioctl() to re-read partition table.
Syncing disks.
[root@wlserver1 /] ocfs2console
Menuden Tasks > Format
Gelen pencereden mount etmek istediginiz yolu seciyoruz.
Mountpoint : /paylasilan
ve son olarak diskimizi automount olabilmesi icin fstab altina ekliyoruz.
[root@wlserver1 /] vi /etc/fstab
/dev/sdb1 /paylasilan ocfs2 _netdev,datavolume 0 0Bukadar suanda her iki node`da /paylasilan altini ortak olarak kullanabiliriz.
~~~~~~~~~~~~~~~~~~~~~~ Yaptiklarimizi test etmek icin~~~~~~~~~~~~~~~~~~~~~~~
Herhangi bir node uzerinde /paylasilan adinda olusturdugumuz klasor icinde bir dosya olusturalim ve diger tarafda gorunecekmi bakalim.
node1 uzerinden
[oracle@wlserver1 /]$ cd /paylasilan/
[oracle@wlserver1 paylasilan]$ vi deneme.txt
node2 uzerindenSimdi ikinci nodedan actik
cd /paylasilan/
[oracle@wlserver2 paylasilan]$ ls
deneme.txt lost+found
[oracle@wlserver2 paylasilan]$ cat deneme.txt
Bu ocfs2 denemesidir.
[oracle@wlserver2 paylasilan]$ vi deneme.txt
[oracle@wlserver2 paylasilan]$ cat deneme.txt
Bu ocfs2 denemesidir.
node1 uzerinden## Yukaridada goruldugu gibi suanda hangi makinede degisiklik yapsak aninda digeri goruyor.
[oracle@wlserver1 paylasilan]$ cat deneme.txt
Bu ocfs2 denemesidir.
Simdi ikinci nodedan actik
~~~~~~~~~~~~~~~~~~~~~~~~~~~~~~~~~~~~~~~~~~~~~~~~~~~~~~~~~~~~~~~~~~~~~~~~
Burada mesala node1 kapatip actiginizda node2 bu alanda degisiklik yapabilecek ve node1 tekrar basladiginda node2`nin yaptigi degisiklikleri gorecektir.
Kaydol:
Kayıtlar (Atom)